New Shop, Who dis

2 Comments

New Shop, Who dis

Hi there, Ok, so I take it for granted that not everyone is active on Instagram or Facebook. As ya’ll know, I’ve been hard at work at building out my new workshop. It’s been an insane rollercoaster of emotions ranging from joy to stress levels I didn’t know where possible. I’m good now, but man, that was a wild ride. Anyways, Today is the first day I actually had a little bit of free time, so I decided to send out a quick update and do a photo tour of the new shop! And again, I couldn’t have done it without your continued support.

IMG_4707.jpg

Welcome to MGT

My little homage to EVH and my front door.

IMG_4648.jpg

The Workshop

So the first thing you’ll see is the very first workbench I ever owned. I got this Husky Bench at Home Depot about 5 years ago. It’s special because I remember when I first bought it, at the time, it was such an expensive investment. But man, did it pay for itself time and time again.
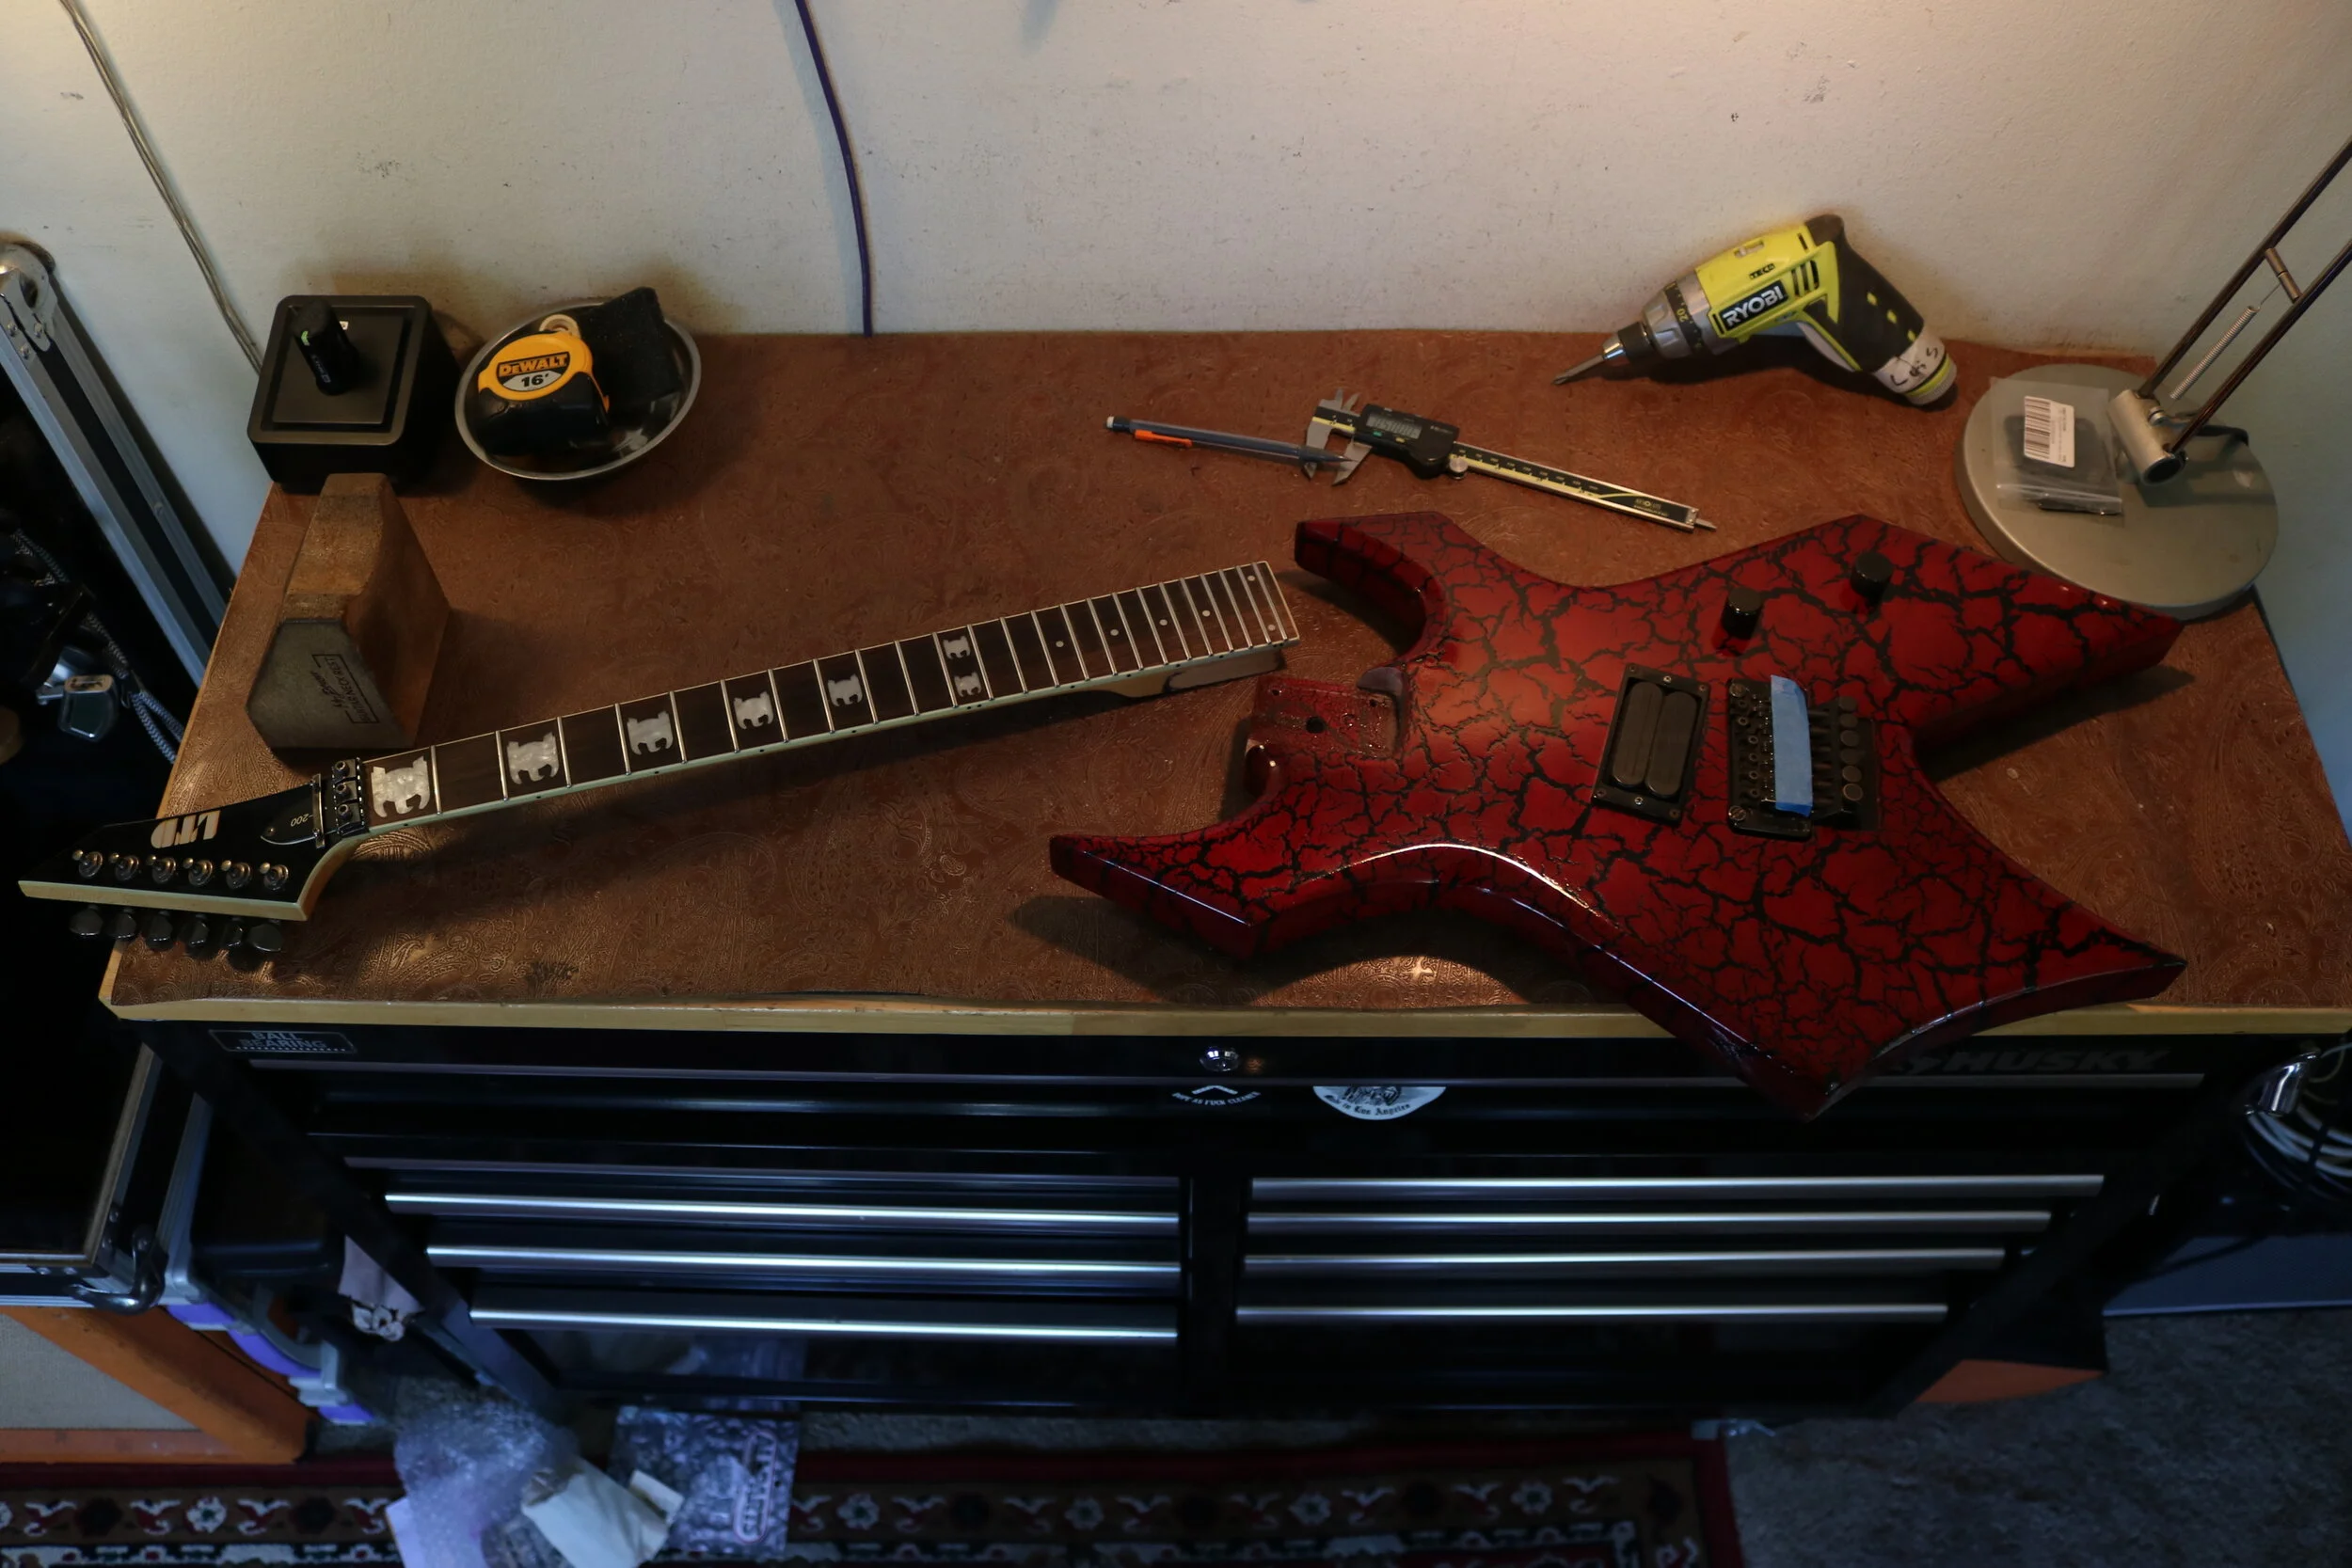
IMG_4687.jpg

New Fancy tools

Finally have the space to get some bulkier and fancier tools. I’ve always wanted one of these
Dan Erlewine Neck jigs. What does it do? Well aside from making me look professional, It simulates string tension when the strings are off, it comes in handy when you’re doing fret work.
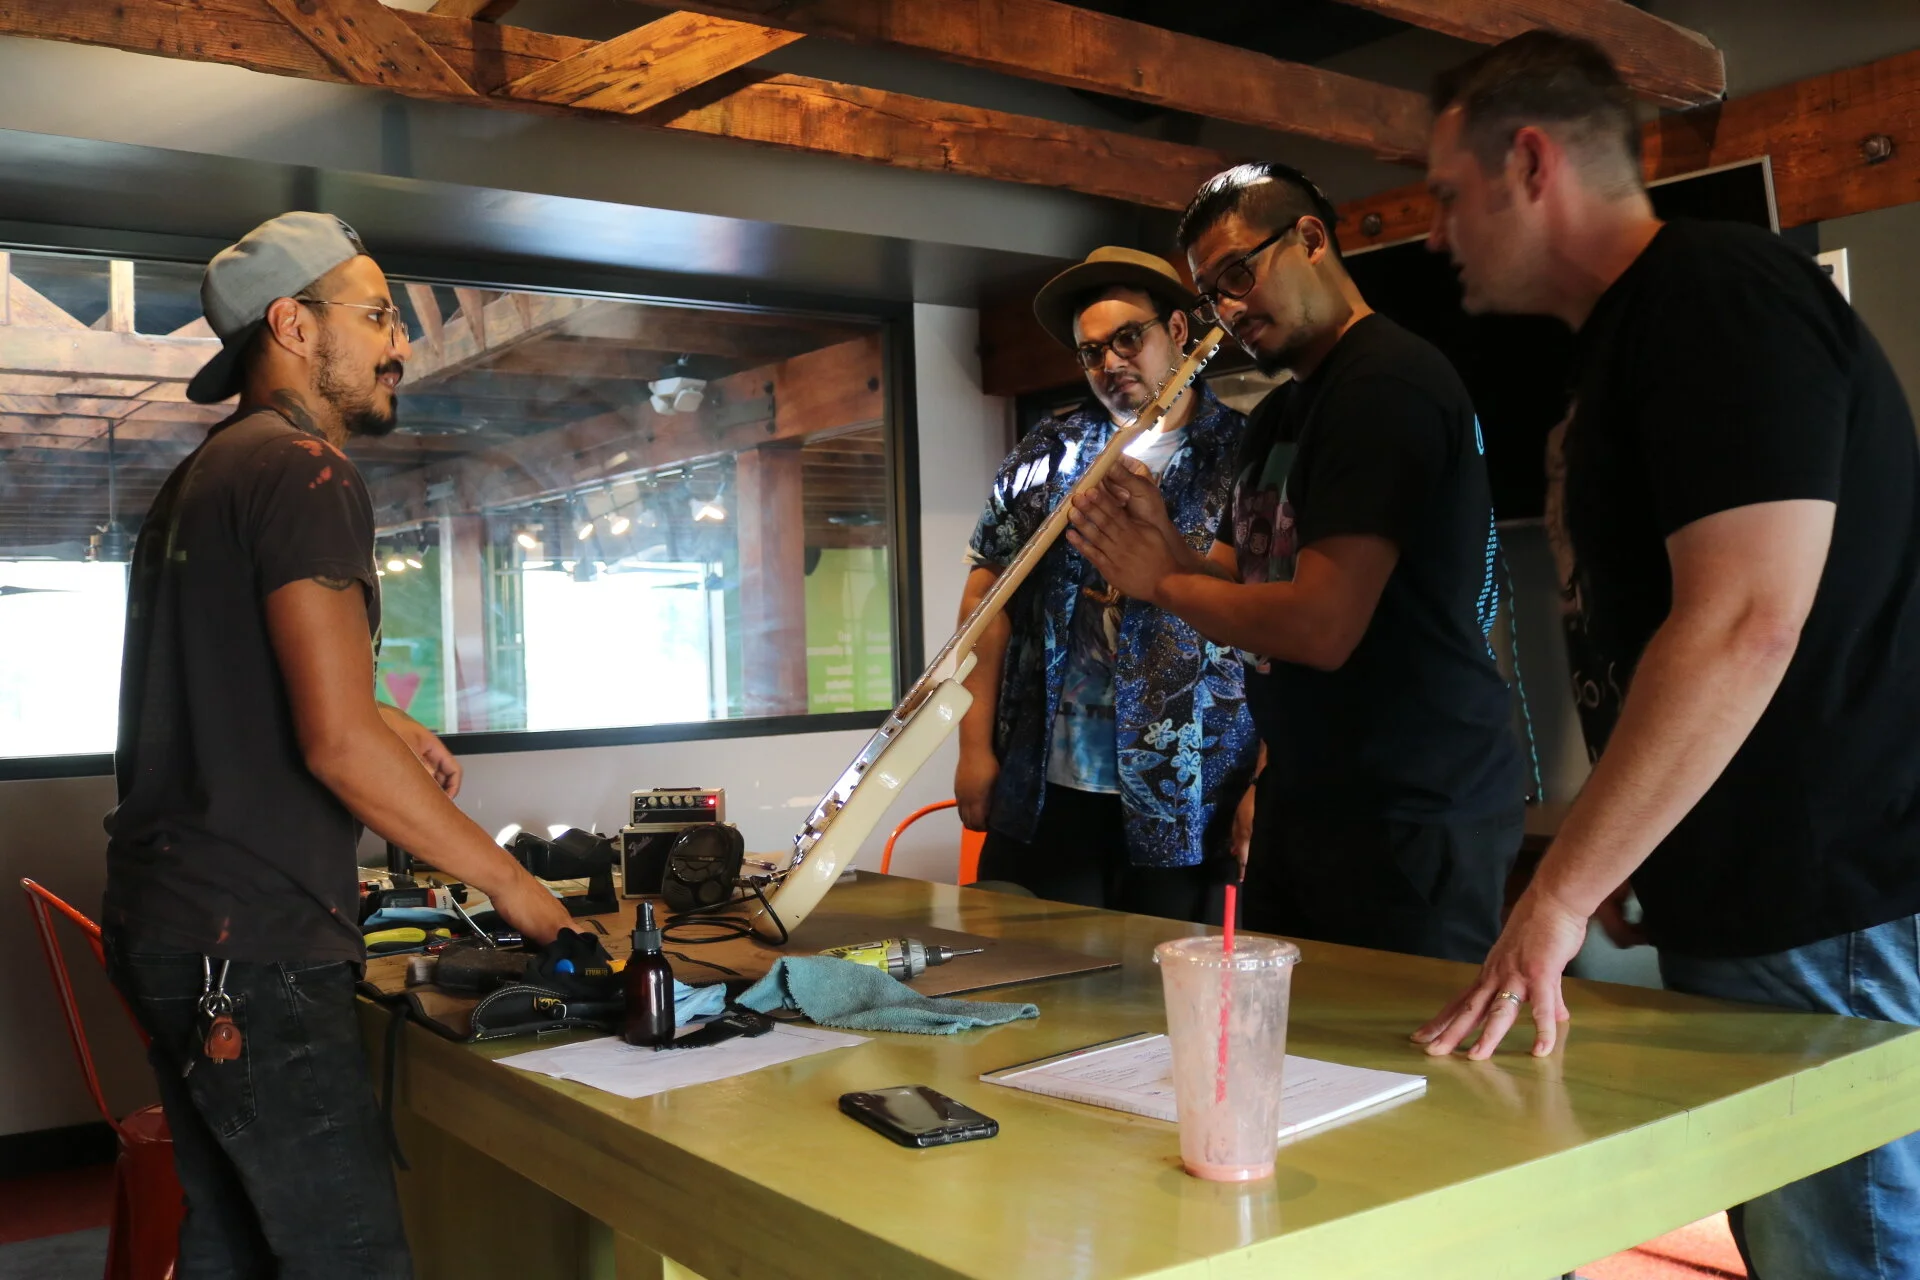
IMG_4680.jpg

The Hangout

Come chill, come have a drink, and lets talk tone.

IMG_4697.jpg

The Studio

The radness! Once you pick up your gear, try your instrument properly. Crank it!!!!!

Well folks, there you have it. It’s still a work in progress and i have a long way to go. It’s still a little surreal to think I have a place as big as this. The neighborhood has been dope, My neighbors have been so welcoming and helpful, the clients that have stopped by are loving. I still have a wood shop that I’ll be building out soon and hopefully expand on my custom ‘El Tone Cartel’ guitars and I’m extremely excited to share that with you in a future update. Till then, I hope you enjoyed this old school picture tour and If you’re in the neighborhood and wanna swing by shoot me an email over at luis@modernguitartech.com

2 Comments

Made in Boyle Heights

4 Comments

Made in Boyle Heights

IMG_2664.jpg

Aight ya’ll, Sunday, December 20, 2020, will go down as a big day for Modern Guitar Tech. After years of working out of living rooms, bedrooms, garages, kitchens, and anywhere else I had to, I can finally say your boy is moving on up. I’ve acquired a full-on workspace/store bigger than I could ever dream of! And I honestly owe it all to you guys and gals. So to those who share my posts, recommend me to their friends, buy merch, but especially those that I have the honor of calling clients, I am forever grateful to you. I am here because of you, and I’m excited to continue to serve you in however way I can.

And with that being said, I’m extremely excited to announce the new location will be in Boyle Heights, LA. Minutes from downtown, plenty of parking (My LA peeps know what’s up). I’ll also be neighbors to Gio and his wonderful crew over at Blackvolt Amps and Palomino Sound Studios!

This part of LA is special to me, surrounded by famous LA landmarks like ‘El Pino,’ Mariachi Plaza, Sixth Street Bridge, all featured in famous Chicano movies I grew up watching. It feels good to know that I’m here, surrounded by my cultural, mi gente, and, more importantly, real Mexican food. Here’s to future success, struggles, life lessons, and love. Hope to see ya’ll very very soon!


Modern Guitar Tech

Boyle Heights, CA.

Coming 2021


4 Comments

Who Invented The Electric Guitar?

1 Comment

Who Invented The Electric Guitar?

In my opinion, Leo Fender is the father of the electric guitar. Not much has changed from his original amps and electric guitars and shows you how revolutionary his designs were. Leo was brilliant in the sense that he took the time to listen and adapt to what the musicians were asking for and any critiques they had towards the gear available at the time. I've built my business on this one idea and have significantly benefited. Leo helped himself to what he believed were the best ideas out there and adapted them to his designs. These individuals played a huge role and deserve much credit as well. I will dedicate this post to some of those individuals who don't get much love in the guitar world but should.


Screen Shot 2020-10-13 at 7.05.00 AM.png

George Fullerton

When he moved to California, George met Leo and opened up a rival electronics shop across Leo's repair shop. They were competitors, but soon Leo convinced the younger man to come work for him. Unlike Leo, George was a pretty good guitar player, which came in handy once they got into the nuance of designing the electric guitar. He sketched outlines of the body, cut a few shapes trying to find the best shape and balance. Along with Fender, George Fullerton helped design the prototype that eventually led to the Esquire, Telecaster, Stratocaster, and so on. They would stay friends, and after the sale of Fender to CBS, they moved on to start Music Man and then G&L, which stands for George & Leo. The dude is a legend.

Screen+Shot+2020-10-13+at+7.24.01+AM.jpg

Paul Bigsby

Bigsby was an American inventor, designer, and master craftsman. Bigsby is best known for being the Bigsby vibrato tailpiece designer we all love and hate. He Built Merle Travis his first electric guitar and likely influenced the Esquire later produced by Fender. In 1954, Fender started advertising the Stratocaster, which featured a similar headstock design to Bigsby's Merle Travis design and featured a new "Tremolo-Action" lever. When Paul Bigsby saw the 'Stratocaster' brochure,' he yelled, "that son of a bitch" ripped me off.

Screen Shot 2020-10-13 at 7.25.56 AM.png

Merle Travis

Paul Bigsby and Merle Travis were close buddies; they bonded over motorcycles and music. Travis would challenge Bigsby to build him wild new devices for his guitars. As a standard guitar player, Travis was sick of all the attention electric steel guitar players would get simply because the instruments were louder (this was a familiar feeling with a few other guitar players at the time). Travis wanted a solid electric guitar with the same height and width as an acoustic guitar but not the depth. He drew up a detailed sketch and handed it to Bigsby. Once finished, it was a beautifully crafted, solid-body electric guitar. It started receiving lots of attention, and one of them was Leo Fender. Believe it or not, Leo asked if he could borrow Merle Travis’s new guitar, and amazingly, Travis agreed. Fender would deny this for the rest of his life.

Screen Shot 2020-10-13 at 7.20.11 AM.png

Don Randall

The fledgling Fender company owed so much of its early success to Randall’s sales skills.

Under Randall’s marketing genius, organizational expertise, and senior partnership with Leo Fender, Fender Sales grew steadily throughout the 1950s and thrived well into the 1960s on an international scale.

Randall is the one who came up with the name Esquire, Broadcaster, Telecaster, Stratocaster, Precision Bass (with Leo Fender), Twin Reverb, Bassman, and others.

Randall also spoke for Fender in the 1964 negotiations that resulted in the company’s sale to CBS; he subsequently became vice president and general manager of the Fender Musical Instrument and Fender Sales divisions of CBS until he departed from the company in 1969.

In the 1970s, he founded Randall Amplifiers.

IMG_7253.jpg

Esther Fender

She endured years of sacrifice while Leo Fender established his radio shop and instrument company. Esther contributed her salary as a telephone operator to Leo’s businesses while adhering to a strict family budget. They never had any children, and there’s not much information on her, but she was such an essential piece of the whole thing. Esther and Leo traveled the world and seemed to enjoy their later years. She ultimately lost her battle with lung cancer and died at the age of sixty-five. When Leo passed, he was buried next to her.


IMG_7457.jpg

The Birth of Loud

Man thought I knew my guitar history, and then I picked up this book. It's full of goodies any guitar enthusiast will love. Ian does a beautiful job of covering the Fender Vs. Gibson era, and I'll cover some of it in a future blog. I highly recommend this book, you guys!

You can get it Here.

*I have no relation to the author and just wanna push this because its so good! You can get it

1 Comment

Comment

My favorite quote that always helps me push through

b68d2b9e-54b1-4bf6-a903-ed1ccd03bb9e.jpg

Life's under no obligation to give us what we expect. We take what we get and are thankful it's no worse than it is.”

-Margaret Mitchell

Today’s post is a quick one and a little reminder to myself of how fucking lucky I am. Ever since I was a little kid I ALWAYS wanted to travel the world, then I discovered Guns N Roses and Slash and right then and there decided that was the best way to do it. I moved to LA back in 2009, broke as fuck, not knowing anyone and ready to be a Rockstar and become the next big thing. Haha, life doesn’t work that way but me following that muse’s call has allowed me to live such an incredible fucking life up to this point. Life isn’t turning out the way I expected it but I’m totally ok with that and you should be as well. Today, be aware of what metrics you use to measure your happiness and how you define success. Make sure YOU have chosen those metrics and never ever let anyone chose them for you.


Comment

Top 5 Strat Mods I Always Recommend

Comment

Top 5 Strat Mods I Always Recommend

The Strat!

One of the most important and greatest inventions mankind has ever created. The design is so brilliant that very little has changed on it. However, In the last sixty six years we as players have definitely evolved. These simple mods have become the most popular ones I do and complement the modern strat player nicely.

IMG_1370.jpg

Treble bleed

Without getting too geeky, an easy mod for your volume control to get a smooth uniform guitar tone from 1 to 10. More of rounded sound at low volume so if you can really utilize volume dynamics. Its not difficult to install either.

IMG_4515.jpg

Threaded screws

This mod makes it so you can disassemble and assemble the neck and body as often as one would want. If your guitar has the dreaded heel truss-rod adjustment I usually recommend this. Some people also swear that due to the tighter connection it can increase tone and sustain. Honestly, i don’t know how I feel about that.

Screen Shot 2020-07-19 at 12.48.47 PM.png

Bridge tone

This one never made sense to me and the fact that fender still ships their guitars like this boggles my mind. I guess this came from Leo’s love of western swing music so he wanted to incorporate those bright pedal steel tones into the strat design. Times have changed, by today’s standards its way too bright and pretty useless if you ask me. This one’s an easy one… you simply attach a jumper wire (red) and voila!

IMG_5795.jpg

7 way sound

This one has become a standard on my guitars. Its and easy and fun way to add 2 more useful tones to your arsenal. I’ve come to realize that although there’s a whole bunch of cool wiring options out there a lot of that it is either gimmicky or just useless. 7 way makes sense to me, it requires no crazy modification and you get 2 more sounds that are actually useful. I like using a push pull as well.

Position 1: Bridge

Position 2: Bridge + Middle

Position 3: Middle

Position 4: Middle + neck

Position 5: Neck

New Positions:

Position 5: Neck + Bridge

Position 4: All 3 pickups

IMG_3404.JPG

Thread lock

Aight Imma get shit for this and yeah this aint really a ‘Mod’ but I’m tired of people calling me about lost nuts or broken solder wires on their output jacks. SIMPLE SOLUTION! a dab of loctite (blue) and properly tighten the nut and boom! no more loose nuts and broken wires.

IMG_5800.jpg

Honorable Mentions…

There’s a few more mods that I could of mentioned like removing the finish on the back of the neck or shielding but I’ll save those for another time. As always, holler if you have any question!

Comment

Lose Your Gibson Nibs

1 Comment

Lose Your Gibson Nibs

IMG_5704.jpg

The Infamous Fret Nibs

I once overheard a guitar sales dude upsell a Les Paul to an unsuspecting customer by using the bound fret nibs as a luxury upgrade. I get it, it looks cool and if I didn’t know any better I’d probably fall for it too.

IMG_5605.jpg

What is it?

Fret Nibs are the little bit of binding that cover the fret ends on Gibson bound fretboards. They look great, they feel nice but here’s the thing…

They don’t serve a functional purpose and Its nothing more than a time and money saving building procedure for Gibson. I’m not throwing shade at them either, it’s just how they make their guitars.


IMG_5705.jpg

#losethenibs

Alright, so eventually every guitar needs its frets replaced. The ‘Nib’ presents a problem in that the only way to replace the frets is to precisely measure each fret and install (which I’ve done and its very very expensive). I usually try and talk the client out of it for the following reasons.

1. The fret never goes in exact and filling is required.

2. The fingerboard is prone to seasonal changes. When it expands It leaves gaps where the string catches and cracks in binding when the board shrinks.

But Most important!

3. Sometimes doing a refret is the best solution to numerous issues that come from seasonal changes. Planning a fretboard and giving it a fresh start is sometimes the only way to remove warps and inconsistencies in the fingerboard. Leaving the nibs in place makes it almost impossible to do it properly.

4, It’s just a lot cheaper.

IMG_5728.jpg

Smooth Like butter

So the trick is to definitely make the fret ends as smooth as possible. if done right, the player won’t be able to tell the difference and it’ll feel just like before. Flush with the binding and round so the hand barely feels it. Any skilled luthier should be able to do this for ya.

IMG_5741.jpg

Tadah!

This Les Paul was in pretty bad shape but its always so dope to be able to get it back to the original condition, minus the nibs of course ;)

#loseyournibs

IMG_5748.jpg

FIN

1 Comment

Pffff, who needs 22 frets

2 Comments

Pffff, who needs 22 frets

Why in the hell would anyone want to remove the 22nd fret on a bolt on neck?

well, there’s two justifiable reasons why.

IMG_3844.JPG

Number 1

Aesthetics- some people really just like the look of the 21 fret and the end being flush with the body. I’m totally guilty of this!

IMG_3849.JPG

Number 2

Necessity- encountering issues with different neck pocket routes (especially imports or vintage). Or issues with thicker pickguards where the overhang is preventing the neck from being seated properly. I’ve also seen a few ones where the neck pickup butts up against the edge of the overhang.

IMG_3888.JPG

Two Simple Solutions

1. Buy a new neck and move on with your life.

2. Cut the little fucker off. (it can be expensive depending on how well you want it done).

On this neck It was for aesthetics and love how it turned out. Just be aware that some of the old fret slot needs to be filled, sanded and polished. I used a silver of maple and wood glue to fill it. Then the next day a spray of sealer to finish it all.

Precaution: the 22nd fret is on an overhang so cutting it off will not affect the scale length. And as always, please please use caution and make sure you understand scale length and wood working. If you dont, just pay someone qualified or buy a proper neck!!!!!

IMG_3889.jpg

FIN

As always thanks for reading and comment with any questions and feedback!

2 Comments

Refret or Fret Level??

Comment

Refret or Fret Level??

IMG_5844 (1).JPG

What is Fret Wear and Why Should I Care?

Fretted instruments that have been played a while will eventually become flat and develop grooves and pits that can cause

1. Fret buzz due to uneven surface

2. Less sustain and dead notes

3. Harder to bend due to increased friction

4. Intonation problems since the string cannot note on a clean center point.

5. Less gigs due to you ruining rehearsals and recordings.

So what to do? theres a few options to remedy this issue. Let’s dive in!

IMG_5455.JPG

Fret level

Fret Level and Crown- The process of leveling out worn out frets and re-rounding (crowing).

Frets eventually wear out. When this happens, the instrument may need refretting or in less severe cases, a “fret level". This is ideal and a few fret levels can be performed on a guitar before it requires a complete refret. It’s best to catch it early and it’ll also save you some serious cash.

Pictured here is a perfect candidate for fret level. It shows some wear but the grooves can be leveled out without removing too much material.

IMG_1047.JPG

Refret and Partial

Refret- The process of replacing all frets. If the grooves are too deep and its below the fret’s halfway mark its best to replace the frets. If the frets are flat and uneven its best to replace the frets

Partial Refret- process of only replacing worn out frets. I usually only do partials when its 5 frets or less. If its more than 5 frets I I suggest a full refret because Its a waste to file the good frets to the level of the bad frets.

Pictured here is a vintage fender jaguar that is in dire need of a full refret. No dings were present but the frets are worn out and flatter than the earth.

Fret Alloy Material

Nowadays, theres a few different options out there. You got different metals and sizes. Each have advantages and disadvantages to them but ultimately I always leave it up to the client.

Stainless Steel- Strongest material out there and will last longer than any other metal. Since there is more involved in the installation expect to pay a bit more. Also, it does seem to add more fret noise and treble to the overall sound.

18% Nickel/silver- The traditional and industry standard. Comes in a variety of sizes and shapes. Easy to work with (compared to the other stuff) but wont last as long (compared to the other stuff).

Cryowire- Nickel frets that have undergone deep freezing treatment in order to make them tougher. Expect to pay an upcharge and they do have limited sizes available.

Gold Evo Wire- Evo gold fretwire is a copper alloy and looks gold. Great if you are allergic to nickel (more people than you’d think). Its pretty tough and durable if stainless isn’t your jam. Some people cant stand the look of gold though.

What’s up with the size?

I can write a whole blog about size and material but for our sake imma keep it simple. Here are the most common sizes I get asked for.

Common Fret Wire Sizes -

Dunlop 6230 : the smallest fret wire found on many vintage Fender necks. Sometimes called fretless wonder.

Dunlop 6105 Tall : modern version of a smaller fret.

Dunlop 6130 Wide/ Tall: very popular and standard for Gibson style modern guitars

Dunlop 6100 Jumbo Wide/Tall: the largest size available. Easy for bending but some people can never get used to it since its a lot more stiff and thick (insert your joke). I recommend trying a guitar with this fret wire before you commit.

There you have it folks! hope this helps someone out there. If you have any questions please feel free to comment or email me at luis@modernguitartech.com

Comment

Neck Transplants and some Advice

1 Comment

Neck Transplants and some Advice

IMG_5911.jpg

Not all scale lengths are created equal.

Alright i cant tell you how many times I’ve been hit up about assembling an old neck to some random guitar body. Yes it is possible and aside from the neck pocket it has to be the correct scale length. Here we have an LTD neck and an old 80’s BC Rich body. Before any adjustments were made the scale length on this was around 26.5 so I could of either turned this into a some kind of baritone guitar or go down to a fender 25.5 scale length.

Removing an Inch

We’ll be removing an inch and I do so in 1/2 increments so its a little easier and for the fear of cracking the fretboard.

IMG_5918.JPG

Clamp and cut

Maple is sturdy and stiff, I find it extremely easy to work with so I prefer making these cuts with a flush cut hand saw.

IMG_5923.JPG

MacGyver

This is a cool little trick where I use my steel square so guide me to the perfect cut.

IMG_5925.JPG

Tracing the Neck Pocket

After the carnage is all done I use the old end piece to trace the neck pocket for a nice and snug fit.

IMG_5928.jpg

Compromises

So in these projects, theres always compromises because I’m usually working within a budget. On this guy we unfortunately will have some minor overhang on the left pocket. After playing it and honestly not noticing it I figured it wasnt that big of an issue. For me to shave and sand and refinish would add too much to the cost. Client was cool with it so we keep on rolling.

IMG_5936.JPG

Snug Fit

The transplant is complete and in stable condition! I dont think I’ve ever in my life played frets 22 to 24 but they still had to be accessible to my client. They sound good and clear and ready for all those 22 to 24 note shred solos.

IMG_5948.JPG

Always necessary

in doing these transplants I always have to level the frets and this was no exception. I also cleaned out the cool 80’s Kahler licensed Floyd (which were built extremely well I must say), fixed some wiring issues and topped this heavy metal machine with LOW AF action and sent if off to a very happy client! So remember kids, look at the scale length before purchasing necks and bodies.

IMG_5951.jpg

1 Comment

If I panic, everyone else panics

Comment

If I panic, everyone else panics

First and foremost I am grateful to have my health and to live in this amazing country we call the USA. I am grateful and thankful for all the amazing and hard working doctors, nurses, health workers, first responders, scientists, delivery drivers, food service providers and everyone else who’s out there in the front lines of this covId-19 battle. I really and truly appreciate your hard work and sacrifices.   

Some of you probably share a similar story as mine. On March 11th and 12th I went from being the busiest I've ever been to losing almost all my work. I was getting ready to embark on a year long tour (march 19th) where I’d probably be making more money than I’d ever have before. Well we all know that went out the window and the following days were a rollercoaster of emotions ranging from fear, sadness, stress to a small little panic attack. Pretty much me going through puberty and high school again.

I took a step back and wrote some shit out to help me understand the situation better. This is what I wrote and I'm posting this in case it can help someone out there as well. Take what you want from it and if you wanna add anything to it please comment below.


IMG_5985.JPG

‘If I panic, everyone else panics’ -Kobe Bryant

Step 1- Don't Panic

Health- your only job right now is to stay healthy, motivated and out of the way of the healthcare professionals. Don’t be a dick and follow the guidelines.

Work- you will have work again. Your talent and work ethic got you to where you are, they will get you there again. Be patient and AGAIN, you will have plenty of work once this is over.

News- get the fuck off of twitter, watch your social media consumption. Trust me, NOTHING good is going to come from it. If you wanna be informed get your news from trusted, unbiased and reliable sources. Unfortunately, fear sells and mainstream media knows this, thus the increased number of opinion-based articles and clever fear-based headlines.

Do your part- Follow the government guidelines and try and stay healthy, workout at home, check on your friends and family to make sure they’re ok.

IMG_1486.JPG

‘Reset, Refocus, Restart’

-Every Yoga Teacher

Step 2- Reset

DON'T HIT THE SNOOZE and wait for this whole thing to blow over. Don't binge on hours of Porn, Instagram or NETFLIX. Really try and figure some shit out in your life. May I suggest starting a journal?

Start your day by writing something you are grateful for

Write a positive statement and read it every morning when you wake up and before you go to bed.

It seems silly but trust me this shit works. When I first quit my job back in 2015 I did this for 6 months straight and it helped me through those panic-ridden days.

C7663D13-396B-4896-AE15-D9DC28E038C9.JPG

‘Wake Up and smell the Routine’ -

unknown

Step 3- Routine/ Habit

I don't care how motivated you are, the only way you’re ever going to succeed is by creating good and healthy habits. We’re creatures of habit and whether you want to admit it or not you’re going to be falling into good and bad habits. You decide.

-Wake up early

-Write out some attainable goals you’d like to achieve and keep them short.

-Change into some kind of work clothes, this helps you feel like the day is getting started

-Be Consistent, shoot for 5 days and then 10 etc. It helps to mark a big X on your calendar every day you are successful. Some people call it ‘not breaking the chain’. I’m too stupid to explain it but there's a whole psychology behind why it works.

IMG_3064.JPG

‘Don't be busy, be productive’ -Unknown

Step 4- Daily Schedule

Make a realistic schedule

Set realistic deadlines and respect them.

Concentrate on the hardest and most uncomfortable goals at the beginning of the day, you’ll have more discipline and energy to see it through.

Go take a walk, you are not a machine so please take breaks. Again, respect the CDC Guidelines.

Reward yourself after a long day's work but don't over do it! For me it's dinner with my wife and an hour or so of Netflix at the end of the day.

REMEMBER, its ok if you don't accomplish everything but even accomplishing 1 thing each day will eventually add up.

IMG_4568.jpg

‘All failures bring with them the seed of unborn opportunity’ -Napolean Hill

Step 5- Execute, Fail, Laugh and Try Again

I urge you to start that podcast, youtube channel, guitar build or whatever else you’ve had an itch for. Worse case is you realize you don’t wanna do it anymore and move on with your life.

And lastly, don't lose your sense of humor. This shit fucking sucks and it’s as real as it gets but there is absolutely no point in checking on the death counter or read articles that show you statistics you’re going to never fully recover from this etc. Fuck all that negative bullshit, If i listened to any of that shit I wouldn’t be here. My whole life I’ve been told why I won’t succeed SO fuck those people, stay safe and healthy and keep those memes coming.

Amor and Gratitude

-Luis

IMG_4566.JPG

Inspirational

Reading & Listening

Resources:

Seth Godin- A generous teacher with an amazing daily blog. Its personally helped me out so much.

Joe Rogan- the motherfucking man himself, his podcast is everything

Napoleon Hill- Original gangsta that was talking about this type of stuff in the 30’s.

Steven Pressfield- If you’re feeling sorry for yourself, go read ‘The War on Art’.

Mike Rowe- Just a well thought out man.

Tim Ferris- I thoroughly enjoy his podcast and ‘Tools of Titans’ book.

David Goggins- Just a lethal no bullshit dude. Go watch his Instagram if you’re feeling lazy.

Jocko Willink- Brilliant Ex Navy Seal who will motivate the hell out of you.

Comment

Used Guitar Buyers Guide

Comment

Used Guitar Buyers Guide

How to buy a Used guitar like a pro

Congratulations! if you’re reading this it means that you’re currently in the market for a used guitar, It should be fun and exciting but in today’s market theres so much crappy gear and misinformation it’s getting hard to know what you should be looking for. Well folks I’m sick and tired of responding to all your DMs so heres my Buyers guide.

This guide is meant to help you understand what you should be looking for and potentially Help you negotiate a better deal. This applies to Online purchases as well, once you RECEIVE the instrument just follow the same steps and then decide if you should keep the instrument or not. lastly, Never buy a guitar because it has a built in tuner in it. #dasit

IMG_1566.jpg

Helpful Lingo

Action- The distance between the strings and the fretboard

Feel- Comfort, aka the setup

Setup- a series of adjustments that ensure proper playability and helps keep your instrument in good health

Fret sprout- condition where the ends of the frets stick out from the edges of the fingerboard. Super uncomfortable.

Nitro- stands for nitrocellulose and its environmentally unfriendly but super sought after. Most Vintage gear has this.

Poly- polyester or polyurethane finish that you see on most newer instruments, If its made overseas it probably has this. ALSO, WONT RELIC EVER! Don’t even try, It always looks like amateur shit.

ACOUSTIC STUFF:

Laminate Top- thin layers of wood glued together. Found in lower priced guitars and not necessarily bad

Veneer Top- thin layers of wood that are only 1 or 2mm thick. They're paper thin and are strictly for aesthetic purposes. Think of it as a sticker that makes your guitar look expensive. I.e. Epiphones, Schecters and other overseas stuff use this.

Pickups Stuff:

Passive- means the pickups and has no electronics in it, No built-in amplification circuitry sensitive to feedback when pushed hard. Can be noisy.

Active- Built-in amplification circuitry, less susceptible to electrical interference compared to passive pickups. Requires additional power, generally by 9-volt battery.


IMG_4761.JPG

Tools to Use

1. Tuner

2. Feeler Gauge

3. Allen Wrenches/Truss Rod Wrenches

4. Mirror and Flashlight

5. Screw drivers

6. Volt Meter

7. A good sober set of eyes.


IMG_1027.JPG

Step 1: Tune and Play it

First thing you should do is tune it up to pitch, we wanna make sure the neck has proper tension for measurement purposes. Now a days, a lot of sellers tend to detune instruments before shipping because they think it’s safer. This is half true but thats a whole discussion on its own. Its also a good way to make sure the tuners work smoothly and proper.

Your time to shine! Just don’t play ‘wonderwall’ and call it a day, play it up the neck, play all your favorite licks. We’re looking for feel (Comfort) and listening for dead spots or buzzy notes which may be a sign of high or uneven frets.


IMG_2334.JPG

Step 2: All about the Neck, Frets and Nut

Sight the neck- looking from the nut towards the bridge and using the string as a reference you wanna compare the angle of the neck to the string. Sighting your neck will give you a quick idea of how much relief is in your neck. Your neck needs at least a slight amount of relief so that the strings don't buzz against the frets.

Frets:

Look for divets, flat or sharp fret ends (some call it fret spout). Could mean shrinking fretboard and easily fixable but ask for a better price.

High frets- If the guitar frets out in certain spots it might need a fret level. Totally normal on used guitars.

On cheap guitars- frets ends will literally be sticking out where you can actually push down on the fret ends. Avoid guitar or negotiate.

Nut:

Check the quality- look for cracks or prior fills.

Check Nut height- Using your feeler gauge measure the height at the first fret. There should be at least .017 on there. If there is only 1 or 2 cents off you might still be alright.

If only 1 or 2 nut slots are too low you’re still alright but if more than 3 then it’ll need a new nut as well.

You know the drill, NEGOTIATE!


IMG_2341.JPG

Step 3: Truss Rod

if there’s an issue with the truss rod it’s going to be a tough and expensive road ahead (assuming its fixable). Make sure it’s working! ALWAYS CHECK AND ADJUST BEFORE BUYING!!!

Tip: (righty tighty & lefty loosey)

If its a Fender style bolt-on and the only way to adjust the neck is to take it off then go ahead and do so or ask the seller to do it for you. These are designed to do this and it’s totally fine.

Tip: you don’t have to remove the strings completely, just loosen the strings and capo at the first fret. The capo acts as a clamp.

Check for shims underneath the neck and for now leave them in the same place.


broken headstock.jpg

Step 4: Structure and Integrity

Structure/Body- We’re Looking for cracks, dings and old repairs. If its an acoustic use a mirror to look inside for lose braces

Joints- Look at joints like where the neck meets the body, the headstock etc. Look for cracks and separation

Headstock integrity- look for old headstock repairs (especially on a Les Paul) be wary of dark finishes that don’t match the original color. Usually a sign of a repair. If possible, ask them to run a black light to see any hidden repairs.


IMG_4020.jpg

Step 5: Hardware and Electronics

Electronic stuff:

Plug it in to an Amp

Try all pickup positions, make sure everything is working fine. If its a Jazzmaster its got like 10 million switches so don’t be lazy and check em all.

Listen for dirty pots and noisy switches. No biggie if there’s some noise, a quick little electronic cleaner spray usually does the trick. If it doesn’t go away after a dab of cleaner it might need that part replaced.

Shake the cable by the output jack, listen for Intermittent signal (cuts in and out).

Volt Meter:

I highly recommend that on all Vintage Gear you test the output of the pickups. This is the best way to get the exact output for each pickup and to catch a weak and dying pickup. Magnets either die or lose their magnetism and wires sometimes do break

Hardware:

Look for Loose Knobs or rattly hardware

Literally shake the instrument, listen for hardware rattle (please dont drop it!)

For Vintage Guitars- On Vintage Gear, always have them confirm the pickups are original by taking them out of the guitar. This is a pain in the ass so its usually customary on more expensive gear. So if its an 1993 epiphone its probably not important. I’ve had a few clients buy vintage guitars with unoriginal pickups and completely devalued the instruments. Its not always malicious either, sometimes it happened during the life of that instrument and no one ever cared.


IMG_4242.jpg

Finally, Original Documentation

As a final note If you’re buying a ‘Custom Shop’ anything please make sure they include all the original certificates. It’ll cost you to have the manufacture certify the instrument and send you new ones and its not cheap either. When possible, check the serial number with the manufacturer. There’s a few good sites online that are pretty damn accurate that can be helpful as well.

Reverb is killing it with all the free resources they offer!

Gibson- https://reverb.com/news/how-to-date-a-gibson-using-serial-numbers-fons-and-logos

Fender- https://reverb.com/news/how-to-date-a-fender


FINAL THOUGHTS, ALWAYS BUY FROM A REPUTABLE SELLER LIKE REVERB.COM, GUITAR CENTER OR A GOOD LOCAL SHOP AND JUST MAKE SURE THEY HAVE SOME KIND OF RETURN POLICY. IF YOU DO DECIDE TO BUY FROM CRAIGSLIST I’D RECOMMEND USING PAYPAL JUST TO COVER YOUR BUTT INCASE SOMETHING GOES WRONG. ALSO, FOR THOSE THAT WANNA DIG IN A LITTLE MORE INTO LEARNING THE INNER WORKINGS OF A GUITAR I DO HAVE A FREE SETUP GUIDE HERE. FEEL FREE TO SHARE IT WITH EVERYONE. GOOD LUCK AND HOPE YOU FIND A KILLER DEAL!

Comment

How to Start a Guitar Company

2 Comments

How to Start a Guitar Company

Ladies and Gents, I present to you the first ever ‘Tone Cartel’ guitar ever built. Funny enough, this guitar was my first parts-tele I ever made. It was about 8 years ago so it was pretty cool to be able to see how much I’ve improved and fix a few mistakes I did. Some stuff was a little too permanent like the ‘checking’ but aside from that I must say that this tele is holding up pretty damn good. Felt good to officially put that decal on there! Here she is! #Modernguitartech001

IMG_4267.jpg

#MGT001

So I build this parts-tele about 8 years ago for a friend. So a little after I graduated from Guitar Craft Academy one of my first gigs was a guitar tech over at Guitar Center in West LA. The dude before me got fired because he pissed off too many customers and was really messy. When I came in I inherited a mess of work and drawers full of parts so little by little I started building this baby.

Specs:

Body: Warmoth 72 tele body

Neck: Warmoth Tele neck 9.5 radius

Hardware: Gotoh bridge & Fender Locking tuners

Electronics: Unknown Bareknuckle Pickup & CTS pots

IMG_4269.jpg

Rough shape

Although my client loved it eventually it sat unplayed for a few years. I’ll also be the first to admit that that Bareknuckle I threw in there didn’t really sound very good. It was just too hot and since my client is more on the bluesier side of things this was a bad choice. Also, because the neck didn’t have a finish it started to absorb dirt and that gave it a hideous and odd coloring. IT LOOKED REALLY BAD!!!!

IMG_4379.JPG

Lets get her back in action

I always get asked what I use when I relic brand new necks. I love the stewmac vintage amber spray but then will mix it up with a tad of dark mahogany spray from Behlem. Then I top it with some clear lacquer to seal everything and finally start sanding.

IMG_4333.jpg

Body and sound

When I inherited this body (Warmoth) it already had a few dings and scratches so we decided to give it a nice cool little relic job. Just made sense and I think it looks really fucking cool too! I again used some of the yellow aged lacquer on edges to make it pop more. Also, I think I get asked alot about the flower pickguard. I made that when I made the guitar, I went to the fabric store and picked out this flower pattern. I dont know why but it just fell in love with it and i think it worked well. We also decided to replace the bareknuckle with a Seymour Duncan 59’.

IMG_4349.jpg

El Tone Cartel is Born

My guitars needed a name and ‘Munoz Guitars’ sounds like a classical guitar company from Spain or some shit. ANYWAYS… I wanted something interesting and cool sounding! EL TONE CARTEL just sounded right. I'll be building under this name now so please stay tuned for more builds I’ve been working on! Enjoy and as always please holler with any questions or feedback.

2 Comments

Comment

Top 10 Biz questions answered!

SO RIGHT BEFORE THE NEW YEAR I ASKED instagram friends TO SUBMIT some BUSINESS RELATED QUESTIONS. I PICKED THE TOP 10 THAT I THINK might be useful TO OTHERS WHO ARE TRYING TO GET THEIR OWN THING GOING. Drum Roll please…

IMG_1515.JPG

How do you manage workload in a one man shop?

I break up bigger repairs into a few days, this gives me plenty of time to do the more simple stuff like setups and more simple repair. Honestly, its a balancing act Im still trying to figure out. I try my hardest to get everything out within a week. Some projects do require more time but I always make sure the client understands that.


297683_258880317463494_2954791_n.jpg

How do you get started finding clients and getting your name out there?

I got started in 2011 at the School I was attending (Musicians Institute). I named the biz after my old band in Texas, It was called Alphabetter and I did it just so I could keep the logo cause i always dug it. I would make shitty fliers and post them everywhere. People would draw dicks on them and it would piss me off. I would also post it on craigslist, facebook groups etc. I used to charge $20 bucks for a setup. If I moved out of LA and had to ‘start’ all over again I would go straight to rehearsal studios, music venues, studios, jam sessions, music schools, I would even go meet the local luthiers and try and build a good relationship with them. Give me a year or two and I know I’d be killing it. So in other words… GO TO WHERE THE MUSICIANS ARE HANGING OUT and stop being a pussy.


7592048144_IMG_9324.JPG

How do you deal with customers that don’t like the work you have done?

Honesty is key here! I always try to get my clients to try out the instrument at the shop once they pickup. But I stress that if they need any type of adjustment or something is not right after they’ve picked up the instrument to inform me and come right come back cause I will fix it. I don’t care if they have to come back 20 times because It has to be right. If its something I didn’t do properly I’ll give em credit towards the next repair just for their time.


What motivates you?

Seeing the brand and biz grow bigger every year has been super motivating. Seeing my skills get better and better is also pretty rad! But also I gotta say Money Money Money! Everyone acts all weird and shit when I say this but the fact that I make a living and then some doing something I really enjoy makes total fucking sense. You know how many times i had people tell me that there was no money in this? I dont know, I lost count but fuck those people and Im glad I did it. I’ve created value and people pay me for it. Feels great.


191293_200601729958020_6597661_o.jpg

How do you grow your business

Word of mouth is king! One day at a time and one client at a time. Live within your means, don’t go getting a Biz loan and store front if you have 5 clients. Build your clientele, work from home, do mobile setups and then when you need a bigger place go get bigger place. I used to do setups out of a 1 bedroom apartment in Hollywood I shared with 4 other dudes. Whatever it takes my dudes.


Modern Guitar Tech-8997.jpg

How do you set your pricing to be fair yet able to make a living?

In the beginning I kinda went off what everyone in town was charging. Then as I got busier and my time became more valuable I gradually eased into charging more. Again, in order for your biz to work you have to live within your means.


image1 (7).JPG

How do you balance going away and coming back with your customers?

I wish I had a better answer for this one but I don't so here's my best shot! Aside from the obvious of doing great work and hoping they can wait I think the best thing you can do is create value and trust with your clients.There’s no gimmicks involved and it takes years and years to build. And for the most part, most of your clients who you achieve this with will be the most supportive when you need some time off.


IMG_3664.JPG

Workshop or working on road? Which do you prefer and best for income?

They both have their pros and cons. With the right band/rpoduction you can make good money being on the road. BUT you will only make money when you’re on the ‘road’. I meet a lot of older road dogs that seem to wish they had a way to make income at home but they just don't know how. I do think everyone should try it though because its a lot of fun.


296830_273907889294070_802901553_n.jpg

Did you work for free? When is the right time to start charging?

Fuck yeah I did! I did stuff for free for friends and the first band I ever ‘guitartech’ for. But anyone else that would hit me up I’d charge something. Charging for work creates a transaction between you and another person and that transaction holds you accountable for your work. I’d say if you’ve been doing this a year or two you should start charging and own it.


photo.JPG

How can you conquer the beginning stages when you don't fully trust your abilities?

I think we all struggle with self-doubt and it never fully goes away. It's a process and the more you stay with it the better you will get. Allow yourself to make mistakes because its part of the process itself. This is kinda hippie shit but concentrating on the bigger picture helps alot. I would mediate (still do) and hold this vision of someday owning a dope guitar repair shop and it reminded me of why I have to keep going. In order to get there I must go through these stages etc. Eye on the price! Oh also, read alot! read books by people you admire!


Modern Guitar Tech-9161.jpg

Final Thoughts:

It Pays to be an optimist

Be Patient

Be Pro Active

Let your work speak for itself

Don't be scared to Fail

It pays to be Honest

Stay off Yelp and similar sites

There are NO shortcuts!

And Lastly, Fuck the haters and enjoy life

Comment

Comment

The Transition Guitar

IMG_4053.jpg

1965 Strat

In 1965 Leo Fender sold his companies to the Columbia Broadcasting System (CBS) for $13 million. During this ‘CBS-era’ Fender shifted to a more mass-production style of guitar making. Luckily for us this 65’ was build the old Fender way. Let’s check out some things that helped me reach that conclusion.

IMG_4008.jpg

Verified

First thing was looking underneath the hood, I wanted to check how original it was and clean some of those scratchy pots as well.

IMG_4012.jpg

Stackpole Pots

Fender used mostly Stackpole brand pots in the 1950's, and CTS brand pots in the 1960's. These pots are date coded and can help verify the authenticity and year of an instrument. The manufacturer code for Stackpole was 304. This number should be stamped on the pot then followed by the Year and Week. Here we got 304-6532 so that translates to 1965 and 32nd week (1965 Aug 9-15th). Interesting right???

IMG_4020.jpg

Just a dab!

Ok since we have original pots I’d hate to replace them. These Stackpoles go for about $150 a piece and thats if you can find em. So we just needed to clean them a little. When using a cleaner like deoxit it literally just takes a little dab. Too many people over do it and soak parts in cleaner which can actually damage the part you’re trying to clean. Less Is more!

IMG_4015.jpg

Evidence of the Past

Its cool to pop off a pickguard and find all the hidden clues one would hope for. Since these were part of the ‘transition’ period its great to see some sought after stuff in here. For example…

1. Rounded pickup routes (late 60’s and 70’s are more squared)

2. Nail holes (by neck and inside bridge route) were a byproduct of spraying the finish. They bolt it down and set it on a lazy susan.

3. The extra shelf in the control cavity also went away during the CBS era.

4. You can also see how much the color has faded compared to the finish under the guard.

IMG_4022.jpg

2OCT65B

Dating a neck seems to be the easiest way to verify the age of a guitar but whats all that other stuff mean? One of my luthier friends finally explained it to me.

The number before the year actually stands for model designation.

2= strat 1=Jaguar 3= tele etc. (this has changed over time)

The letter stands for the neck profile

A" is the narrowest, "B" is normal, and "C" is the widest. (this has changed over time)

IMG_4038.jpg

Not so original

This guitar isn’t completely clean, at some point someone created a scoop in the pickguard for the practical purposes. The Truss Rod adjustment on these necks were in the heel and the only way to adjust them is by removing the guard or taking the neck off. Stew mac has a cool little tool that made this adjustment a lot easier.

IMG_4030.jpg

Full of Refret

Another thing this 65 had done was a refret. People always ask me if a refret devalues a guitar and I guess it kinda does but the instrument has to be playable as well. Most collectors will understand this and if the job was done correctly in my opinion I think its totally fine. Luckily, whoever did the refret on this did a pretty good job.

IMG_4047.jpg

Filling dem slots

Bone nut on guitars are very much like tires on a car in that they will eventually need replacing. This is a replacement nut that was just cut a little too low by another tech. I usually only replace a nut when most of the slots are low but on this one only the E and the A needed raising. I ended filling the D slot just for good measure so we can get another year out of it before I replace it. I use this glue for all nut repair stuff and this accelerator if you can find it.

IMG_4034.jpg

Vintage Tuners

I always get asked how much slack one should leave when restringing a guitar. Good rule of thumb is about 2 and 1/2 posts up. This will give you enough winds to keep it the string at a good angle from the nut to the tuner. For example, here im doing the Low E. See picture

1965

Here she is all dolled up, super fun project and turned out spectacular. Incredible that this is a 55 year old machine still going strong! I can tell you that id be surprised if some of the stuff people are making nowadays will make it past 10 years. Please feel free to comment and ask any questions you might have!

Comment